
Introduction
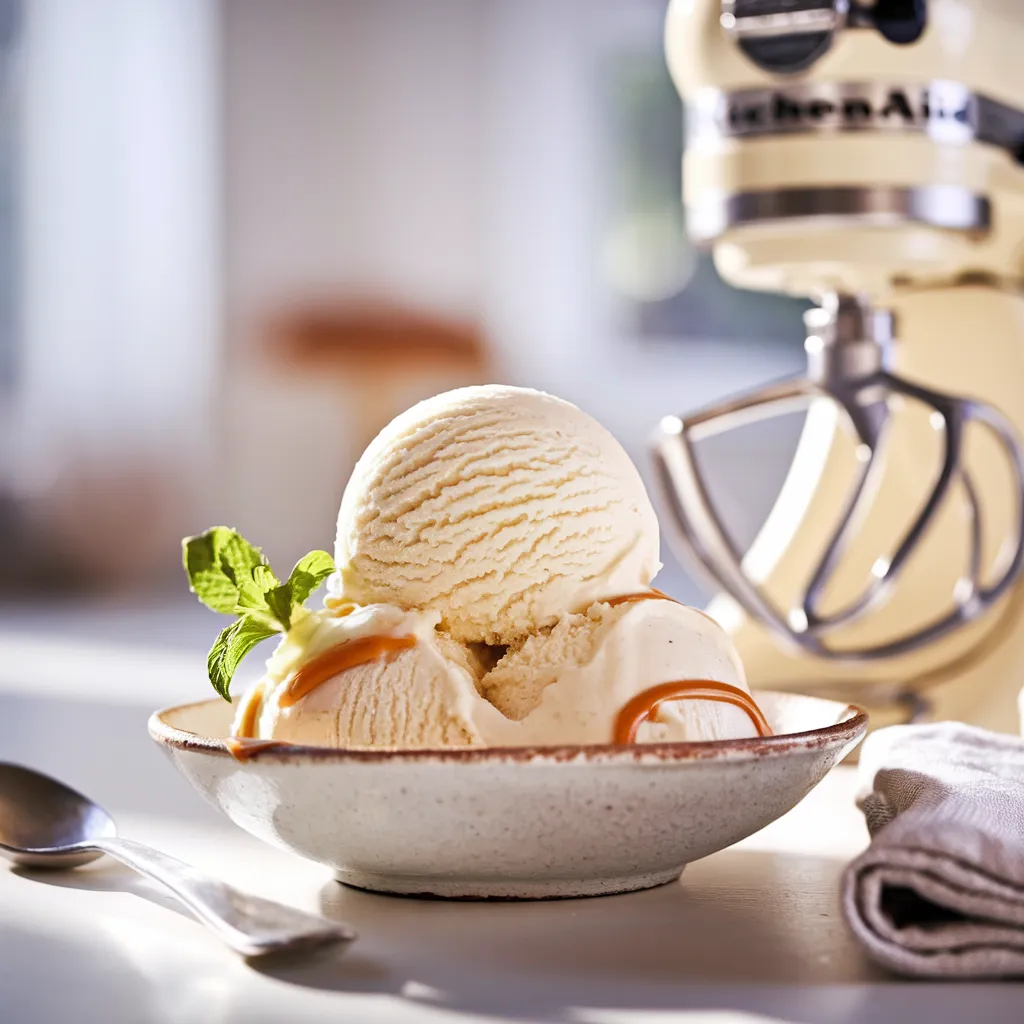
There’s something magical about making ice cream at home, especially when using a KitchenAid Ice Cream attachment. As a long-time food lover, I still remember the first time I churned homemade ice cream in my KitchenAid stand mixer—it was pure joy! No store-bought ice cream can compete with the rich, creamy texture and fresh flavors of a batch made from scratch. Whether you’re making it for a special occasion or just because you crave something sweet, this recipe will show you how to create creamy, delicious homemade ice cream in just 30 minutes!
Why You Will Love This Recipe
If you’ve never made ice cream at home before, you’re in for a treat! This KitchenAid ice cream recipe is:
- Incredibly Easy: The KitchenAid ice cream attachment does most of the work for you.
- Super Creamy & Smooth: Thanks to the slow churning process, you get a rich, velvety texture.
- Customizable: Add your favorite mix-ins like chocolate chips, fruit, or nuts.
- No Preservatives or Artificial Additives: Just pure, wholesome ingredients.
- Family-Friendly: A fun activity to do with kids and loved ones.
Once you try this recipe, you’ll never go back to store-bought ice cream again!
Equipment Needed
Before you start, gather the following kitchen tools:
- KitchenAid Stand Mixer – The base for your ice cream attachment.
- KitchenAid Ice Cream Maker Attachment – Essential for churning the ice cream.
- Mixing Bowls – To whisk together the ice cream base.
- Whisk – For blending the ingredients smoothly.
- Measuring Cups and Spoons – For precise ingredient measurements.
- Spatula – To scrape down the sides.
- Airtight Freezer Container – For storing the ice cream after churning.
Ingredients
To make the creamiest homemade ice cream, you’ll need:
- 2 cups heavy cream – Essential for a rich and creamy texture.
- 1 cup whole milk – Balances the fat content while keeping it smooth.
- ¾ cup granulated sugar – Sweetens the ice cream perfectly.
- 1 tablespoon pure vanilla extract – For classic vanilla flavor.
- A pinch of salt – Enhances the sweetness and balances flavors.
- Optional Mix-ins: Chocolate chips, fresh fruit, or cookie crumbles.
Ingredient Substitutions
- For a lighter version: Use half-and-half instead of heavy cream.
- For dairy-free: Substitute with coconut milk and almond milk.
- For refined sugar-free: Replace sugar with honey or maple syrup.
Instructions
Step 1: Prepare the Ice Cream Maker
Place the KitchenAid Ice Cream Maker attachment bowl in the freezer at least 24 hours in advance. It needs to be completely frozen before churning.
Step 2: Make the Ice Cream Base
- In a mixing bowl, whisk together heavy cream, whole milk, sugar, vanilla extract, and salt until fully combined and sugar is dissolved.
- Cover the mixture and refrigerate for at least 2 hours, or overnight for best results. Chilling the base enhances flavor and ensures better churning.
Step 3: Churn the Ice Cream
- Attach the frozen KitchenAid Ice Cream Maker to your stand mixer.
- Set the speed to low (stir setting) and slowly pour the chilled mixture into the attachment.
- Let it churn for 20–25 minutes, or until it reaches a soft-serve consistency.
Step 4: Freeze & Enjoy
- Transfer the freshly churned ice cream into an airtight container.
- Freeze for 2–4 hours for a firmer texture, or enjoy immediately for a soft-serve treat.
Tips for the Best Homemade Ice Cream
- Chill Your Base: Always refrigerate your mixture before churning for a smoother texture.
- Don’t Overfill the Bowl: The ice cream expands as it churns.
- Use High-Quality Ingredients: Fresh cream and pure vanilla extract make a difference!
- Add Mix-ins at the End: Stir in chocolate chips, fruit, or cookie pieces in the last 5 minutes of churning.
Variations
Looking for ways to switch it up? Try these variations:
- Chocolate Ice Cream: Add ¼ cup unsweetened cocoa powder to the base.
- Strawberry Ice Cream: Blend 1 cup fresh strawberries and mix into the base.
- Dairy-Free Version: Use coconut milk instead of dairy and sweeten with maple syrup.
- Cookies & Cream: Crush 8-10 chocolate sandwich cookies and fold in at the end.
Serving Ideas
- Top with fresh berries or caramel sauce for extra indulgence.
- Pair with warm brownies or cookies for a delicious contrast.
- Make ice cream sandwiches by scooping it between two cookies.
- Blend into a milkshake for a creamy, dreamy treat.
FAQs
Can I make this ice cream without the KitchenAid attachment?
Yes! If you don’t have the attachment, use a standard ice cream maker or follow the freeze-and-stir method by mixing every 30 minutes until set.
How long does homemade ice cream last?
Stored in an airtight container, it stays fresh for up to 2 weeks in the freezer.
Why is my ice cream too hard after freezing?
Homemade ice cream lacks preservatives, so it firms up more. Let it sit at room temperature for 5-10 minutes before scooping.
Can I use alternative sweeteners?
Yes! Honey, maple syrup, or monk fruit sweetener can be used, but they may slightly alter the texture.
Nutritional Information (Per Serving)
- Calories: 250
- Carbohydrates: 20g
- Protein: 3g
- Fat: 18g
- Saturated Fat: 10g
- Sugar: 17g
Concluding Thoughts
Making KitchenAid Ice Cream at home is a fun, rewarding experience that lets you control the ingredients and flavors. Whether you’re a first-time ice cream maker or a seasoned pro, this easy, creamy recipe will become a go-to favorite! Try it out, experiment with different mix-ins, and let me know in the comments how yours turned out. Don’t forget to share this recipe with your friends and family!

KitchenAid Ice Cream Recipe – Easy, Creamy & Homemade in 30 Minutes!
Description
This KitchenAid ice cream recipe delivers a rich, velvety treat in just 30 minutes! With simple ingredients and the magic of your KitchenAid ice cream maker, you’ll enjoy smooth, homemade ice cream that’s far better than store-bought. Perfect for family desserts, summer gatherings, or satisfying an ice cream craving anytime.
Ingredients
Instructions
-
Step 1: Prepare the Ice Cream Maker
Place the KitchenAid Ice Cream Maker attachment bowl in the freezer at least 24 hours in advance. It needs to be completely frozen before churning.
-
Step 2: Make the Ice Cream Base
- In a mixing bowl, whisk together heavy cream, whole milk, sugar, vanilla extract, and salt until fully combined and sugar is dissolved.
-
Cover the mixture and refrigerate for at least 2 hours, or overnight for best results. Chilling the base enhances flavor and ensures better churning.
-
Step 3: Churn the Ice Cream
- Attach the frozen KitchenAid Ice Cream Maker to your stand mixer.
-
Set the speed to low (stir setting) and slowly pour the chilled mixture into the attachment.
-
Let it churn for 20–25 minutes, or until it reaches a soft-serve consistency.
-
Step 4: Freeze & Enjoy
- Transfer the freshly churned ice cream into an airtight container.
-
Freeze for 2–4 hours for a firmer texture, or enjoy immediately for a soft-serve treat.
Nutrition Facts
Servings: 6 ServingCalories:250kcalTotal Fat:18gSaturated Fat: 10gCholesterol:70mgSodium:50mgPotassium:120mgTotal Carbohydrate:20gSugars: 17gProtein:3g
Note
- Chill Your Base: Always refrigerate your mixture before churning for a smoother texture.
- Don't Overfill the Bowl: The ice cream expands as it churns.
- Use High-Quality Ingredients: Fresh cream and pure vanilla extract make a difference!
- Add Mix-ins at the End: Stir in chocolate chips, fruit, or cookie pieces in the last 5 minutes of churning.